Manual & FAQ
1. Flash Live ISO to USB stick
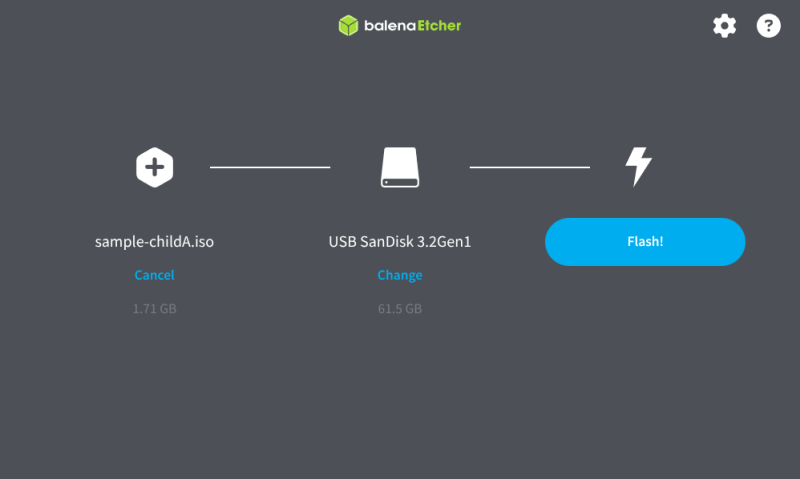
Download balenaEtcher and flash Live ISO onto a USB stick. This process makes Live ISO bootable from the USB stick. This is not equivalent to simple copying the ISO file onto the USB stick. A nano USB stick SanDisk Ultra Fit USB 3.2 is recommended, or alternative minimalistic USB stick with a high read speed (e.g. 300MB/s).
2. Set auto-boot from USB stick
Insert the USB stick into a USB 3.0 (or higher) port. Power on the computer and, when the manufacturer’s logo appears, enter the BIOS/UEFI setup (e.g., Del, F2, or Esc – refer to your computer’s manual). Navigate to the Boot settings and set the USB device as the first boot option.
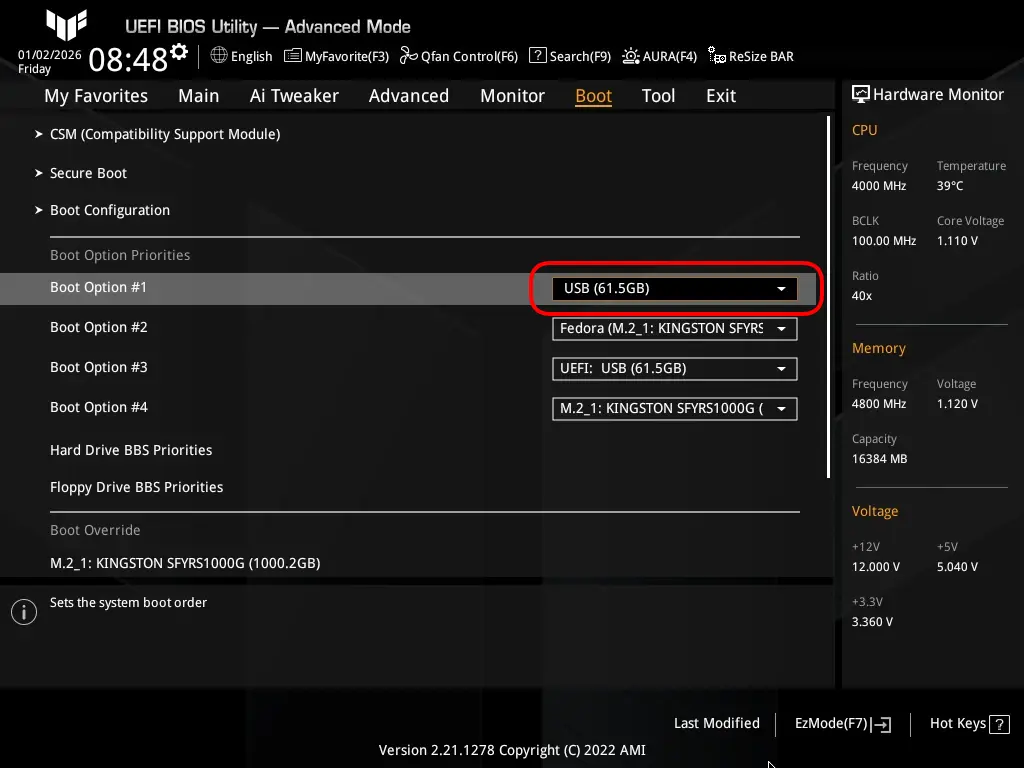
(actual layout is vendor-dependent)
If the USB stick is not visible, you may need to disable Fast Boot or Quick Boot, as these options can skip USB device initialization.

(actual layout is vendor-dependent)
If Legacy/CSM (BIOS) mode is available, enable it to preserve the boot order even when the USB stick is removed. When a bootable USB stick is inserted, the system will automatically boot from it; when it is removed, the system will boot from the internal drive. Re-inserting the USB stick will again automatically boot the system from the USB stick.

(actual layout is vendor-dependent)
You may load the default BIOS settings to revert any changes if the configuration does not work as intended. Then repeat the steps using the correct values to enable automatic boot from the USB stick.
On UEFI systems without Legacy/CSM (BIOS) support (common on newer hardware, approx. 2023 and later), if the USB stick is removed and reinserted, the system will not boot from the stick unless the boot order is manually changed again. Therefore, automatic booting from a USB stick requires that the USB stick remain physically inserted.
We recommend using a low-profile (nano-form) USB stick, such as the SanDisk Ultra Fit USB 3.2, to minimize the risk of accidental removal.

On desktop hardware, the easiest solution is to connect the USB stick to a rear-panel port where it is not directly accessible. An alternative is to connect the USB stick internally to a motherboard USB header inside the case using an appropriate internal USB cable.
On laptops, if hardware modification is acceptable (for older hardware), you may secure the nano-form USB stick physically in place by applying a layer of hot glue on the bottom part of the stick. Important: this solution is entirely at your own risk, may void warranties, and should only be considered if you fully accept potential damage.

One-time boot for testing purposes: Insert the USB stick into a USB 3.0 (or higher) port. Power on the computer and, when the manufacturer’s logo appears, open the one-time boot menu (e.g. F12, F9, F8, or Esc – refer to your computer’s manual). Select the USB device from the list to boot from. If the USB stick is not visible, you may need to disable Fast Boot or Quick Boot in the BIOS/UEFI setup, as these options can skip USB device initialization.
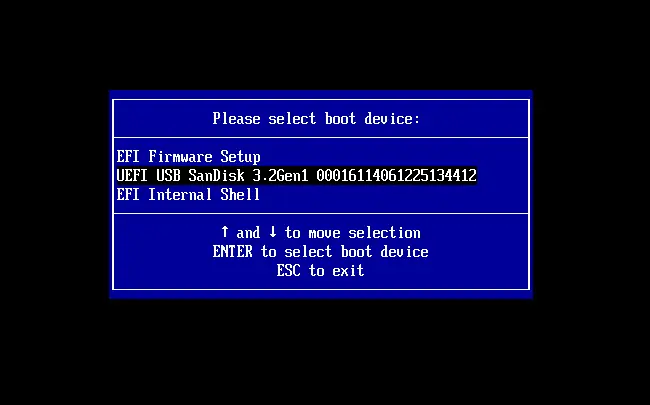
(actual layout is vendor-dependent)
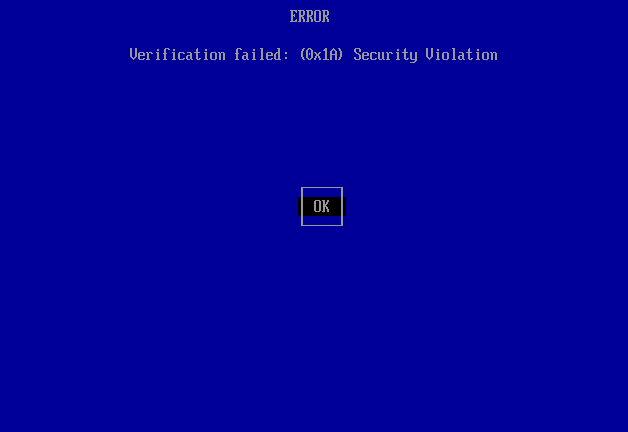
Secure Boot: If a blue screen with the message “ERROR Verification failed” appears, follow the steps to enroll the Live ISO public key. This is required only on the first boot. If the one-time boot option for testing purposes was used, repeat the boot selection after reboot to select the USB drive again.
3. Boot Live ISO from USB stick
Boot the Live ISO from the USB stick and connect to the Internet using an Ethernet cable or Wi-Fi. If you use Wi-Fi, you will be prompted to enter the network name (SSID) and password, as shown below. The Live ISO will connect automatically on the next boots.
Select WiFi network with PSK security typeOR press Enter to re-scan WiFi networks
OR press Enter to connect via Ethernet cable
WiFi network:
Password:
The Live ISO boot process automatically launches the Chromium web browser as the only application. No other GUI environment is used, keeping it as simple as possible for children. On laptops, use the Fn keys to adjust screen brightness and volume.

Close the last Chromium tab to shut down the system. This ensures that persisted browser data (such as accepted website consent settings and logins, if optionally preconfigured in the configuration form) is properly written to persistent storage. All non-persistent data will be lost. DO NOT use the power button to shut down the system.